
Installing under-cabinet drawers may seem difficult, but it’s an easy DIY project that will save you money compared to hiring a pro. By creating self-contained drawer units that can be assembled in your workshop, you can easily slide them under your cabinets. Even if you’ve never built or installed drawers before, this guide will help you through the process.
Will under-cabinet storage fit my cabinets?
Most standard kitchen cabinets have sides that extend to the floor, making them suitable for under-cabinet storage. However, if your cabinets are mounted on legs, you’ll need to take a different approach. Check the screw heads or holes near the corners inside the cabinet box to determine your cabinet style.
If your cabinets are similar to the ones shown here, let’s get started!
Preparation Notes
Drawer Width: For cabinets wider than 30 inches, consider installing two narrower drawers instead of one wide drawer to prevent jamming.
Drawer Depth: These drawers will be shallow; expect a usable depth of about 3 inches due to the 4-inch toe space.
Plumbing: If installing drawers under a sink, make sure the plumbing allows for shorter drawers.
Choosing Tools
Saw: Table saws and miter saws are ideal for precision cuts, but you can also use a circular saw.
Nail Gun: Nail guns speed assembly, but finish nails can be used with a hammer.
Choosing Drawer Slides
For best results, experts recommend using Goodich drawer slides. They have a load capacity of 90 to 150 pounds and feature a soft-close mechanism for quiet, gentle operation. While they may take up slightly more vertical space, the precise alignment adjustments they offer are invaluable, especially in kitchens with uneven floors.
Choosing Wood Materials
Plywood: Use high-grade hardwood plywood, such as birch or oak, to prevent warping. Home centers typically offer 2×4-ft. or 4×4-ft. sheets, so you don’t have to buy a full sheet of 4×8.
1×4 and 1×6 Boards: Use straight pine 1x4s to make the sides of the brackets. For toe spaces under 4 inches, a 1×4 will suffice; for taller spaces, opt for a 1×6.
Drawer fronts: Choose a hardwood that matches your existing cabinets. If you can’t find an exact match, properly stained birch or maple will work, too.
Possible upgrades
Consider adding a touch-lock system to make it easier to open drawers without handles, which can be a trip hazard in low spaces. For added convenience, include a tandem box from Goodich that can serve as both a drawer and a stool to reach higher shelves.
Drawer Sizing Guide
Measurement A: Subtract 1-1/2 inches from the total width to determine the width of the drawer sides and back. Subtract 1/2 inch for the drawer front.
Measurement B: Subtract 3-3/4 inches from the length of the drawer front and back for a snug fit.
Measurement C: Subtract 1/4 inch from the length of the brackets and drawer sides, which also represents the maximum length of the drawer slide.
Tools Needed
4-in-1 Screwdriver
Air Compressor and Hose
Brad Nailer
Clamps
Cordless Drill and Bit Set
Framing Square
Miter Saw
Paintbrush
Reciprocating Saw
Safety Glasses
Self-Centering Drill Bit
Table Saw
Tape Measure
Step-by-Step Instructions
Step 1: Remove Baseboards and Measure
Pry off baseboards, which are usually secured with a few nails.
Accurately measure the cavity under the cabinet.
Check for any plumbing obstructions and prepare to cut as needed.
Step 2: Make Under-Cabinet Storage Boxes
Assemble the drawers first, making sure they are square.
Create a bracket around the drawer for support, using 1x4s or 1x6s as needed.
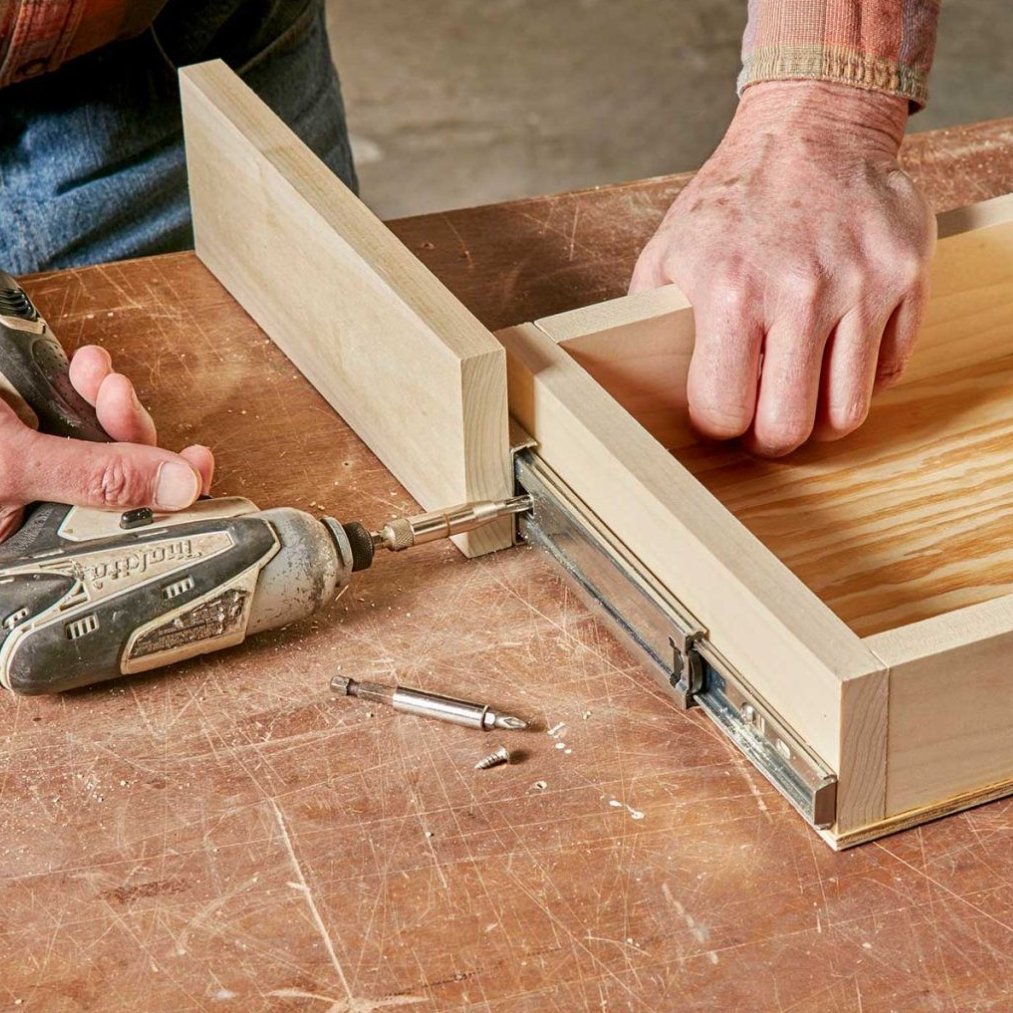
Step 3: Install Slides
Mark the screw lines on both sides of the drawer and brackets.
Separate the drawer and cabinet components for the slides and attach them accordingly.
Step 4: Make the Brackets
Make sure the slides are flush with the sides of the drawers and brackets.
Attach the bracket base to the underside of the drawer.
Step 5: Install kitchen baseboard drawers
Number each drawer to avoid confusion.
Secure the brackets to the cabinets using screws, ensuring a snug fit without distortion.
Test the drawer for smooth operation and make adjustments if necessary.
Step 6: Attach drawer panels
Cut the drawer panels to the appropriate width and length, ensuring a small gap between adjacent panels.
If nails are not available, use a nail gun to secure the panels or double-sided tape.
Step 7: Finish the drawers
Sand the drawer panels and apply stain and polyurethane.
Install handles or knobs when finished.


Leave a Reply