
Self closing door hinges are a convenient feature in many homes, allowing the door to close automatically and preventing it from being left ajar. However, when these hinges malfunction, they can become a nuisance. This guide will teach you how to troubleshoot and repair self-closing door hinges, from making necessary adjustments to replacing hinge springs when necessary. With these tips, you can get your door back to smooth, quiet operation.
Repairing Self-Closing Door Hinges Features and Values
| Characteristics | Values |
|---|---|
| Problem | Self-closing door no longer works automatically |
| Solution | Adjust or replace the hinge |
| Installation | Align hinges with previous nail indents or drill new pilot holes |
| Adjustment | Determine if the door closes too quickly/violently or too slowly/not fully; adjust hinge spring tension accordingly |
| Tools Needed | Allen wrench, screwdriver, hammer, C-clamp, hex wrench, pliers |
| Replacement Parts | Spring, pin |
What You’ll Learn
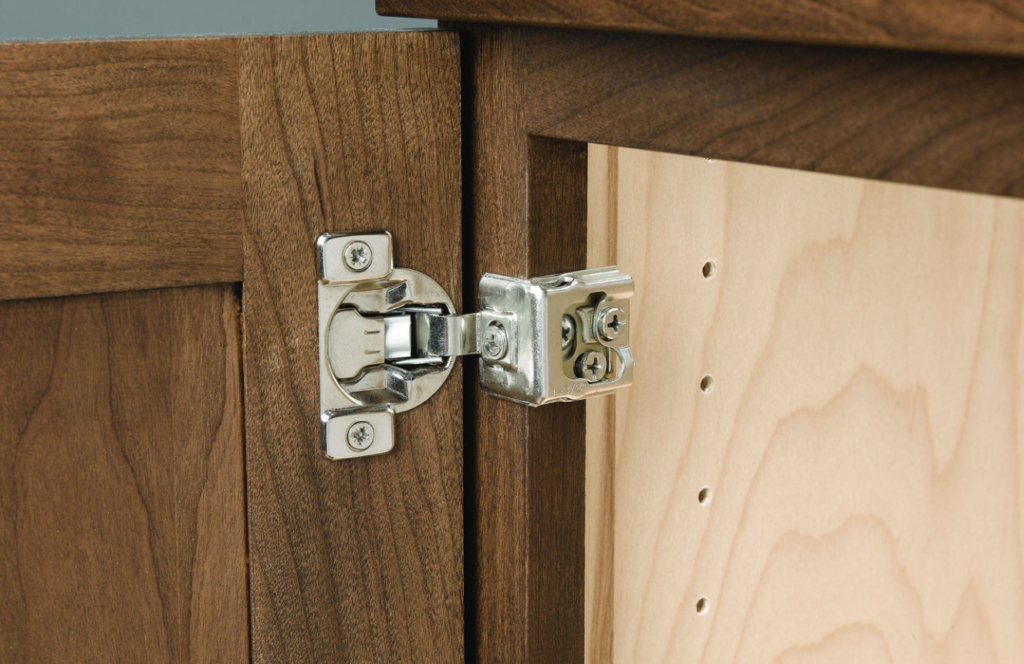
How to Loosen Self-Closing Door Hinges
Self-closing hinges, also called spring hinges, are essential for doors like garage doors, which help close behind you and prevent smoke from entering your home. If your door slams shut or won’t latch properly, you need to adjust the tension in the hinge spring.
- Ensure safety: Close the door fully and secure it as tightly as possible. Lock it to prevent accidental opening during adjustment.
- Find the tension adjuster: Find the hole next to the locking pin on the hinge spring, usually at the top or bottom of the hinge.
- Adjust the pin: Rotate the locking pin to remove it. To loosen the hinge, put the pin back into the hole farther from the door.
- Test Closure: Release the spring pressure and test the door’s closing mechanism. If the door still slams shut, repeat the process, moving the pin farther from the door’s other hole.
- Balanced Hinge: If there are multiple hinges, adjust them to the same tension for balanced performance.
- Final Test: Open and close the door to make sure it operates smoothly. If it continues to slam shut or won’t latch properly, repeat the adjustment process.
How to Tighten Self-Closing Door Hinges
If your door doesn’t close completely, you need to tighten the hinge tension:
- Assess the situation: Open the door fully and let it close. If it closes too quickly or too violently, the tension is too high. If it doesn’t close completely, the tension is too low.
- Tighten the Hinge:
Close the door.
Locate the tension adjuster hole next to the locking pin on the hinge spring.
Use a nail set or Allen wrench to remove the locking pin.
Replace the pin in the hole closest to the door to increase the tension. - Test the Door: Release the spring pressure and check to see if the door now closes completely. If not, repeat the process, moving the pin closer to the door until the desired tension is achieved.
- Consider lubrication: If there is any noise after tightening, lubricate the metal parts with a lubricant such as WD-40.
When to Replace Hinge Springs
If adjusting the tension and lubricating the hinges doesn’t solve the problem, you may need to replace the springs:
- Signs of wear: Check for rust or corrosion on the springs, which may indicate a need for replacement.
- Buy replacement parts: You can find replacement springs at most home improvement or hardware stores.
How to Install Self-Closing Door Hinges
Installing self-closing door hinges is simple but requires careful preparation:
- Determine the number of hinges: Generally, use one hinge for every 30 inches of door height. For doors under 60 inches, use two hinges; for doors over 60 inches but under 90 inches, use three hinges; for doors under 120 inches, four hinges are recommended.
- Mark hinge locations: Measure the size of the door and mark the hinge locations on the door and door frame.
- Drill pilot holes: Using a drill bit slightly smaller than the screws, drill pilot holes where the hinges will attach.
- Install hinges: Screw the hinges into place. If the new hinges align with the previous nail indentations, you can install them without drilling new holes.
- Hang the door: Align the door with the hinges and screw them into place. Make sure the door swings freely and latches easily before making any adjustments.
Adjust spring tension on self-closing door hinges
- Assess the need for adjustment: Open the door fully and let it close. If the door slams, you need to reduce the tension; if the door does not close completely, increase the tension.
- Ease the tension: For doors that slam, close the door and adjust the pin farther away from the door.
- Tighten the tension: For doors that will not close, move the pin closer to the door.
- Test after each adjustment: Continue adjusting until the door closes smoothly.
Final Notes
If your hinges still perform poorly after adjustment, consider lubricating them or replacing the springs. Different self-closing hinges may have unique features, so always consult the manufacturer’s instructions for specific adjustments. Be careful when working under tension springs to avoid injury.
By following these steps, you will ensure that your self-closing door hinges operate smoothly and provide the convenience and functionality you expect. Enjoy worry-free door operation at home!


Leave a Reply